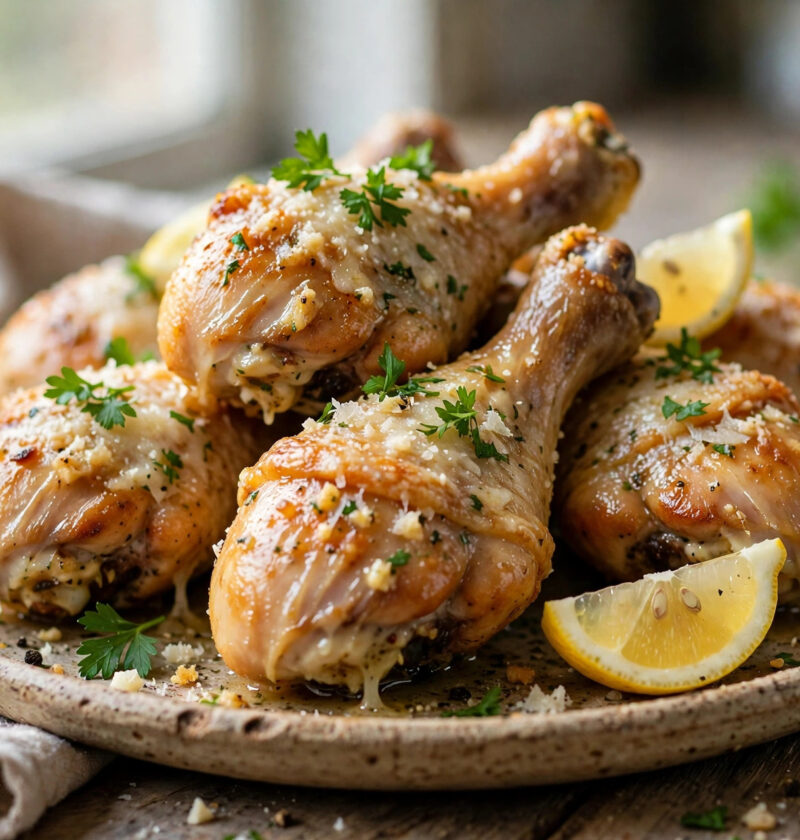
Chicken drumsticks are the most forgiving cut in the whole chicken case, and the air fryer was practically invented for them. The skin renders and crisps in the circulating hot air while the dark meat underneath stays juicy — no deep fryer, no splattering oil all over the stove, and no sad, soggy skin. Tossed at the end in garlic butter and a snowfall of parmesan, these drumsticks taste like the best wings you have ever had, only meatier, cheaper, and far easier to feed a family with.
The secret is a dry surface and a little patience. Drumsticks straight from the package are damp, and damp skin never crisps. A good pat-dry, a light coat of oil, and a seasoned breadcrumb-parmesan crust give the air fryer something to work with, and flipping them halfway means every side gets its turn in the hot air. The garlic butter goes on last, off the fiercest heat, so the garlic stays sweet and fragrant instead of burning — and the parmesan melts into the nooks of the crust rather than turning into a dusty coating.
These are weeknight gold: ten minutes of hands-on work, a basket that does the rest, and a dinner that disappears fast. Serve them with a crisp salad and roasted potatoes, or pile them on a platter with lemon wedges and let everyone eat with their hands, which is honestly the only correct way.
Why You’ll Love This Recipe
- Genuinely crispy skin, no deep frying: The air fryer renders the skin crackly-crisp with just a teaspoon or two of oil per batch.
- Juicy every single time: Dark meat is forgiving — drumsticks stay tender even if you overshoot by a couple of minutes, unlike chicken breasts.
- 35 minutes, mostly hands-off: Ten minutes of prep, then the basket does the work while you make a side or set the table.
- Budget-friendly family dinner: Drumsticks are one of the cheapest cuts at the store, and this recipe makes them taste like a treat.
- That garlic parmesan finish: Warm garlic butter and salty parmesan cling to the crispy crust — it is the kind of coating people pick off the plate.
- Endlessly dippable: Ranch, marinara, hot honey, or just lemon wedges — drumsticks welcome every sauce in the fridge.
Tools You’ll Need
- Air fryer (basket-style, 5-quart or larger): You need room for the drumsticks in a single layer; crowded baskets steam instead of crisping.
- Paper towels: For patting the drumsticks truly dry — this is the step that makes the skin crisp.
- Two bowls: One for the egg wash, one for the parmesan-breadcrumb coating.
- Tongs: For flipping the drumsticks halfway and tossing them in the garlic butter without tearing the crust.
- Instant-read thermometer: The only reliable way to know the chicken is done — you are aiming for 175°F at the thickest part.
- Small saucepan or microwave-safe bowl: For melting the garlic butter at the end.
Ingredients
For the Drumsticks
- 8 chicken drumsticks (about 2 1/2 lbs), skin on
- 1 teaspoon kosher salt
- 1/2 teaspoon black pepper
- 1/2 teaspoon garlic powder
- 1/2 teaspoon paprika
- 1 tablespoon olive oil
For the Parmesan Coating
- 1/2 cup panko breadcrumbs
- 1/2 cup finely grated parmesan cheese
- 1 teaspoon Italian seasoning
- 1/4 teaspoon red pepper flakes (optional)
For the Garlic Parmesan Finish
- 3 tablespoons unsalted butter
- 3 cloves garlic, minced
- 2 tablespoons finely grated parmesan cheese
- 1 tablespoon chopped fresh parsley
- Lemon wedges, for serving
To Serve
- Ranch dressing, marinara, or hot honey for dipping
- Roasted potatoes, salad, or garlic bread
Instructions
- Dry the drumsticks well. Pat each drumstick very dry with paper towels, all the way around. Season with the salt, pepper, garlic powder, and paprika, then drizzle with the olive oil and rub it in.
- Set up the coating. In a shallow bowl, mix the panko, parmesan, Italian seasoning, and red pepper flakes. Press each drumstick into the mixture, turning to coat all sides, and shake off the excess.
- Preheat the air fryer. Preheat to 400°F for 3 minutes. Lightly spray the basket with cooking spray so the crust does not stick.
- Air fry the first side. Arrange the drumsticks in a single layer in the basket, skin-side up, with a little space between them. Cook at 400°F for 12 minutes.
- Flip and finish. Flip each drumstick with tongs and cook for another 10 to 13 minutes, until the crust is deep golden and an instant-read thermometer reads 175°F at the thickest part, away from the bone.
- Make the garlic butter. While the chicken rests for 2 minutes, melt the butter in a small pan over medium-low heat. Add the garlic and cook for 30 seconds, just until fragrant — do not let it brown.
- Toss and serve. Transfer the drumsticks to a large bowl, pour over the garlic butter, and toss gently. Shower with the extra parmesan and parsley, and serve immediately with lemon wedges and your dipping sauce of choice.
Serving Ideas
- With roasted potatoes and a green salad: The classic plate — crispy, salty, fresh, and filling without much effort.
- Game-day platter: Pile them high with ranch, hot honey, and marinara for dipping, plus celery sticks and carrot sticks.
- Over a big Caesar salad: Slice the meat off the bone and toss it through romaine, croutons, and Caesar dressing for a hearty main-dish salad.
- With garlic bread and marinara: Lean into the parmesan theme — the bread is perfect for mopping up any garlic butter left on the plate.
Tips for the Best Results
- Dry skin is non-negotiable. Wet skin steams. Spend the extra minute with paper towels and the crust will reward you.
- Do not crowd the basket. Cook in two batches if you have to — a single layer with air circulating around each drumstick is what makes them crisp.
- Grate your own parmesan if you can. Pre-grated cheese has anti-caking agents that do not melt as well; a fine grate clings to the crust beautifully.
- Check the temperature, not the clock. Drumsticks vary in size; 175°F at the thickest part is done and juicy, while 165°F can still be a little chewy near the bone.
- Toss gently. The crust is crisp but not armor — a gentle toss in the butter keeps it intact instead of knocking it off.
Mistakes to Avoid
- Skipping the preheat. A cold basket means the coating sits in lukewarm air and absorbs moisture instead of crisping straight away.
- Burning the garlic butter. Garlic goes from fragrant to bitter in seconds. Thirty seconds over medium-low heat is plenty — it keeps cooking off the heat.
- Using coarse parmesan in the coating. Big shreds fall off in the basket; a fine grate is what sticks and crisps.
- Saucing them too early. The garlic butter goes on at the very end, right before serving. Toss them and let them sit and the crust softens.
- Cooking from frozen. Thaw drumsticks fully first, or the outside overcooks while the meat near the bone stays underdone.
Storage
- Refrigerator: Store leftovers in an airtight container for up to 3 days.
- Reheating: Re-crisp in the air fryer at 375°F for 4 to 5 minutes. The microwave makes the crust soggy, so save it for emergencies only.
- Freezing: Freeze cooked drumsticks in a single layer, then bag them for up to 2 months. Reheat from frozen in the air fryer at 375°F for 12 to 15 minutes.
FAQs
Can I use bone-in thighs instead?
Yes — the same coating and temperature work beautifully. Bone-in thighs need about 2 to 3 minutes longer per side; check for 175°F at the thickest part.
Do I have to use breadcrumbs?
No, but they are what make the crust extra craggy. For a lighter version, skip the panko and use just parmesan and seasoning — still crisp, just less crunchy.
Can I make these ahead?
You can coat the drumsticks up to 8 hours ahead and keep them uncovered in the fridge — the dry fridge air actually helps the skin crisp. Air fry just before serving.
What if my air fryer is small?
Cook in two batches and keep the first batch warm on a wire rack in a 200°F oven. Never stack drumsticks in the basket.
Is 175°F really the right temperature?
For dark meat, yes. Chicken is safe at 165°F, but drumsticks are more tender and juicy at 175°F, where the connective tissue has fully relaxed.
Recipe Summary
- Prep time: 10 minutes
- Cook time: 25 minutes
- Total time: 35 minutes
- Servings: 4
- Course: Dinner
- Cuisine: American, Italian-inspired