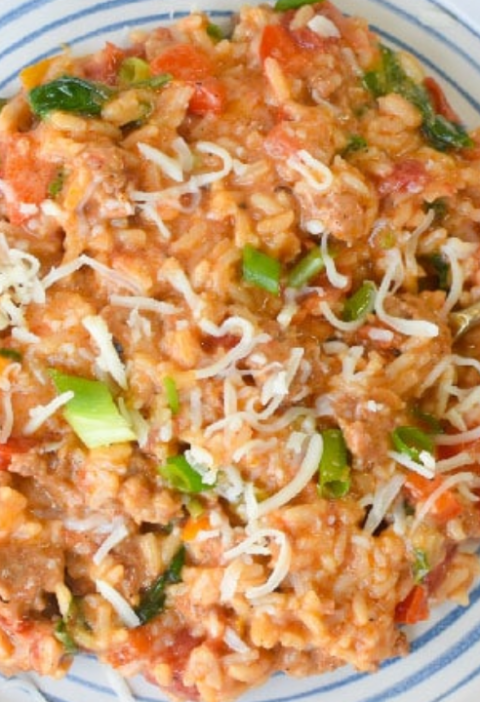

Taco night is the best night — until you’re standing at the counter assembling fifty tacos while the beef gets cold and the toppings slide everywhere. This cheesy taco beef skillet fixes all of that. Everything goes into one big skillet: seasoned ground beef, peppers, onions, black beans, corn, and zesty Rotel tomatoes, all simmered together and finished under a molten blanket of cheddar and pepper jack. Thirty minutes, one pan, and the whole table digs in straight from the skillet.
The magic here is in how the flavors build. The beef gets a hard sear first so it browns instead of steams — that’s where the deep, savory flavor comes from. Then the taco seasoning gets bloomed in the rendered fat for about 30 seconds, which wakes up every spice so they taste twice as bold as they’d taste from a packet stirred in at the end. A can of Rotel brings the tomatoes, green chiles, and a gentle background heat, and the black beans and corn turn it into a proper filling rather than just flavored meat.
Then the cheese goes on — and this is the part that makes it a skillet and not just taco meat. A thick layer of freshly shredded cheddar and pepper jack, slid under the broiler for two minutes until it’s bubbly, golden, and stretching in long pulls. Serve it as tacos, pile it into bowls, spoon it over nachos, or fold it into quesadillas. One skillet, endless ways to eat it.
Why You’ll Love This Recipe
- One pan, 30 minutes, zero assembly line: Everything — meat, veggies, beans, cheese — happens in a single 12-inch skillet. Dinner is on the table in half an hour and there’s one pan to wash.
- Bolder flavor than packet tacos: Blooming the taco seasoning in hot beef fat (instead of sprinkling it over water like the packet directions say) makes the spices taste richer and more complex.
- That broiled cheese top: Two minutes under the broiler turns the cheese into a golden, bubbly, stretchy lid. It’s the difference between “taco meat” and “the skillet everyone fights over.”
- A complete filling in one dish: Black beans, corn, peppers, and onions mean this isn’t just seasoned beef — it’s a complete, filling dinner with protein, fiber, and vegetables built in.
- Feeds a crowd cheaply: A pound and a half of ground beef stretches into 6 generous servings for a fraction of what takeout would cost, and it’s infinitely more satisfying.
- Endlessly flexible: Use it for tacos tonight, nachos tomorrow, quesadillas the next day. One batch covers multiple dinners without anyone feeling like they’re eating leftovers.
Tools You’ll Need
- Large oven-safe skillet (12-inch): Cast iron is ideal here — it sears beautifully and goes straight under the broiler for the cheese finish. A stainless skillet with an oven-safe handle works too.
- Wooden spoon or sturdy spatula: For breaking the beef into crumbles as it browns. A flat-edge spatula scrapes up the browned bits best.
- Colander or fine-mesh strainer: For draining the black beans, and for draining the beef fat if you end up with an excess.
- Chef’s knife and cutting board: For dicing the onion, bell peppers, and chopping cilantro for the finish.
- Box grater: For shredding the cheese fresh. This is non-negotiable for a smooth, melty top — bagged shreds never melt the same way.
- Measuring spoons: For the seasoning blend, especially if you’re making the homemade taco seasoning instead of using a packet.
Ingredients
For the Beef and Vegetables
- 1 1/2 lbs ground beef (80/20)
- 1 medium yellow onion, diced
- 1 red bell pepper, diced
- 1 green bell pepper, diced
- 3 cloves garlic, minced
- 2 tablespoons taco seasoning (1 packet, or homemade: 1 tbsp chili powder, 1 1/2 tsp cumin, 1 tsp smoked paprika, 1 tsp garlic powder, 1 tsp onion powder, 1/2 tsp oregano, 1/2 tsp salt)
- 1 tablespoon tomato paste
For the Skillet Filling
- 1 can (10 oz) Rotel diced tomatoes with green chiles, undrained
- 1 can (15 oz) black beans, drained and rinsed
- 1 cup frozen corn kernels (no need to thaw)
- 3/4 cup low-sodium beef broth
For the Cheese Topping
- 1 1/2 cups shredded sharp cheddar cheese, freshly grated
- 1 cup shredded pepper jack cheese, freshly grated
To Serve
- 1/4 cup chopped fresh cilantro
- Sour cream, for dolloping
- Lime wedges
- Sliced jalapeños (optional)
- Warm tortillas, tortilla chips, or rice
How to Make One-Pan Cheesy Taco Beef Skillet
Step 1: Brown the beef hard
Heat your oven-safe skillet over medium-high heat until it’s properly hot — a drop of water should sizzle hard. Add the ground beef and break it into large chunks with your spoon, then leave it alone for 2 to 3 minutes so it can actually brown. That deep golden crust is where the flavor lives; if you stir constantly, the beef just steams in its own juices and tastes flat. Break it into bite-size crumbles once it’s browned on one side, and cook through, 5 to 6 minutes total.
Step 2: Drain and season
If there’s a pool of rendered fat in the pan — more than about a tablespoon — tip the skillet and spoon off the excess. Push the beef to one side, add the diced onion and bell peppers to the cleared space, and cook 4 to 5 minutes until they start to soften. Stir in the minced garlic, the taco seasoning, and the tomato paste, and cook for 30 to 45 seconds, stirring constantly, until everything smells intensely fragrant.
Step 3: Add the Rotel, beans, corn, and broth
Pour in the Rotel (juice and all), the drained black beans, the frozen corn, and the beef broth. Stir well, scraping up any browned bits from the bottom of the skillet. Bring to a simmer, then reduce the heat to medium-low and let it bubble gently for 8 to 10 minutes, stirring occasionally, until the liquid has reduced and thickened into a rich, saucy filling that clings to the beef instead of pooling.
Step 4: Top with cheese and broil
Move your oven rack to the upper-middle position and preheat the broiler on high. Spread the filling into an even layer and shower the cheddar and pepper jack evenly over the top, right out to the edges. Slide the whole skillet under the broiler and broil for 2 to 3 minutes, watching closely, until the cheese is fully melted, bubbly, and golden-brown in spots.
Step 5: Rest and garnish
Pull the skillet out and let it rest for 5 minutes. Shower with the chopped cilantro, then serve straight from the skillet with sour cream, lime wedges, and jalapeños on the side. Set out warm tortillas, tortilla chips, and rice, and let everyone build their own.
Serving Ideas
- Classic tacos: Spoon the cheesy filling into warm corn or flour tortillas with shredded lettuce, diced tomatoes, and a squeeze of lime.
- Taco rice bowls: Ladle the skillet filling over cilantro-lime rice with shredded cabbage, sour cream, and guacamole.
- Loaded nachos: Spread tortilla chips on a sheet pan, spoon the beef filling over them, and finish under the broiler with pickled jalapeños and pico de gallo.
- Quesadillas: Spread the filling on half of a large flour tortilla, fold, and crisp in a buttered skillet 2 to 3 minutes per side.
- Taco-stuffed baked potatoes: Halve a fluffy baked potato and pile the cheesy beef on top with sour cream and green onions.
Tips for the Best Taco Beef Skillet
- Use 80/20 ground beef, not lean. The fat renders out as the beef browns and becomes the cooking medium for the vegetables and spices.
- Shred your own cheese. Bagged shredded cheese is coated in starch that keeps it from melting into a smooth, stretchy blanket.
- Don’t skip the tomato paste. It deepens the color and adds a concentrated, savory backbone.
- Get the liquid right before the broiler. The filling should be thick and saucy when it goes under the broiler — if it’s still watery, the cheese will get greasy instead of golden.
- Watch the broiler like a hawk. Cheese can go from golden to burnt in 60 seconds. Stand there and watch.
- Season to taste at the end. Taste the filling after it simmers and add salt, a squeeze of lime, or an extra pinch of cumin before the cheese goes on.
Mistakes to Avoid
- Not draining the beef fat. More than a tablespoon of rendered fat makes the final skillet greasy and the cheese separates into an oil slick.
- Steaming the beef instead of searing it. Hot pan, chunk it, leave it alone, then break it up — gray, rubbery crumbles have no browned flavor.
- Burning the seasoning. Taco seasoning scorches fast. Thirty to 45 seconds of blooming is plenty.
- Adding cheese to a watery filling. Simmer until thick first, or the top broils into a greasy, sliding sheet.
- Using pre-shredded cheese. Freshly grated melts into a smooth, stretchy blanket — bagged cheese gets grainy and oily.
- Walking away from the broiler. The cheese finish takes 2 to 3 minutes, and the line between golden-brown and charcoal is razor thin.
Storage and Reheating
Refrigerator: Store leftovers in an airtight container for up to 4 days. The flavors actually deepen overnight.
Freezer: Freeze the beef filling (before the cheese topping) for up to 3 months. Thaw overnight in the fridge; add fresh cheese and broil when reheating.
Reheating: Warm in a skillet over medium heat with a splash of beef broth, then top with fresh shredded cheese and broil 2 to 3 minutes.
Frequently Asked Questions
Can I use ground turkey or chicken instead of beef?
Yes — add 1 tablespoon of olive oil since poultry has less fat, and consider an extra teaspoon of cumin and a squeeze of lime at the end.
Can I make this ahead of time?
Cook through Step 3, cool, and refrigerate up to 4 days. Reheat in the skillet, top with fresh cheese, and broil — don’t broil the cheese until serving time.
Is this spicy?
Mild-to-medium as written. Use mild Rotel and Monterey Jack instead of pepper jack to keep it kid-friendly; add jalapeño or cayenne for more heat.
Can I make this without an oven-safe skillet?
Yes. Transfer the filling to a 9×13 baking dish, top with cheese, and broil in the dish.
What’s the difference between this and taco meat?
The peppers, onions, black beans, corn, and Rotel make it a full meal component, and the broiled cheese lid turns it into something you can serve straight from the pan.
Can I double this recipe?
Yes, but not in one skillet — brown the beef in batches or use a large Dutch oven, then broil in a 9×13 dish.
Recipe Card Data
- Prep Time: 10 minutes
- Cook Time: 20 minutes
- Total Time: 30 minutes
- Servings: 6
- Course: Dinner
- Cuisine: Mexican-inspired
- Method: Stovetop + broiler